%%{init: { "theme": "base", "themeVariables": { "git0": "#2563eb", "git1": "#dc2626", "gitBranchLabel0": "#ffffff", "gitBranchLabel1": "#ffffff", "commitLabelColor": "#1e293b", "commitLabelBackground": "#f1f5f9" } } }%%
gitGraph
commit id: "start README"
branch add-frankenstein
checkout add-frankenstein
commit id: "add Frankenstein"
Collaboration
If I could turn back time
Cher, If I Could Turn Back Time (1989)
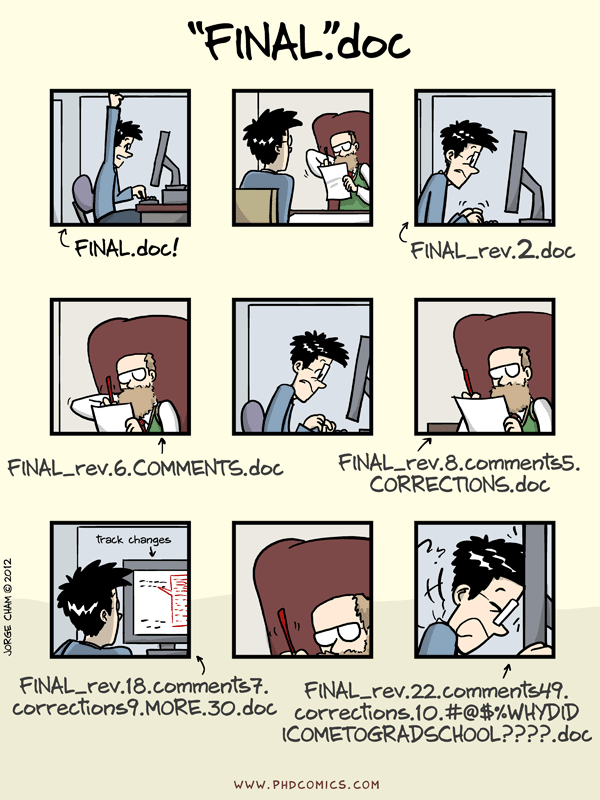
Collaboration is the focus of this session. Git records changes and GitHub gives us a place to propose, inspect, discuss, and combine them. You will first make your own work understandable through a branch and pull request, then repeat the workflow with another person.
ImportantBefore you begin
Confirm that you have a GitHub account with multi-factor authentication, Git is configured with your name and email, and VS Code can access Git. If not, return to Setting Up or ask an instructor.
TipPresentation Slides
Explore the interactive visual presentation for this session: Git and GitHub Collaboration Slides
Learning outcomes
By the end of this two-hour session, you will be able to:
- make a change on a short-lived branch and propose it with a pull request;
- inspect a diff before accepting a change;
- use a fork and pull request to contribute to another repository;
- distinguish
originfromupstreamand check where a push or merge goes; - review and merge a collaborator’s contribution; and
- synchronize repositories and remove completed branches.
The course project
Each participant owns a separate public course repository named bookstats. Throughout GECS, that repository grows from a README and plain-text books into a tested, automated, published analysis.
We use books from Project Gutenberg because the files are small, open-access, and easy to inspect. Real research data may be too large, sensitive, or restricted to commit to Git.
Your project begins empty:
bookstats/Collaborate with your future self
The person most likely to revisit today’s work is you—perhaps on another day or another computer. A README, a focused history, and an inspectable pull request make the project understandable before anyone else joins it.
Start the repository
- Launch VS Code.
- Select File > Open Folder….
- Create and open a folder named
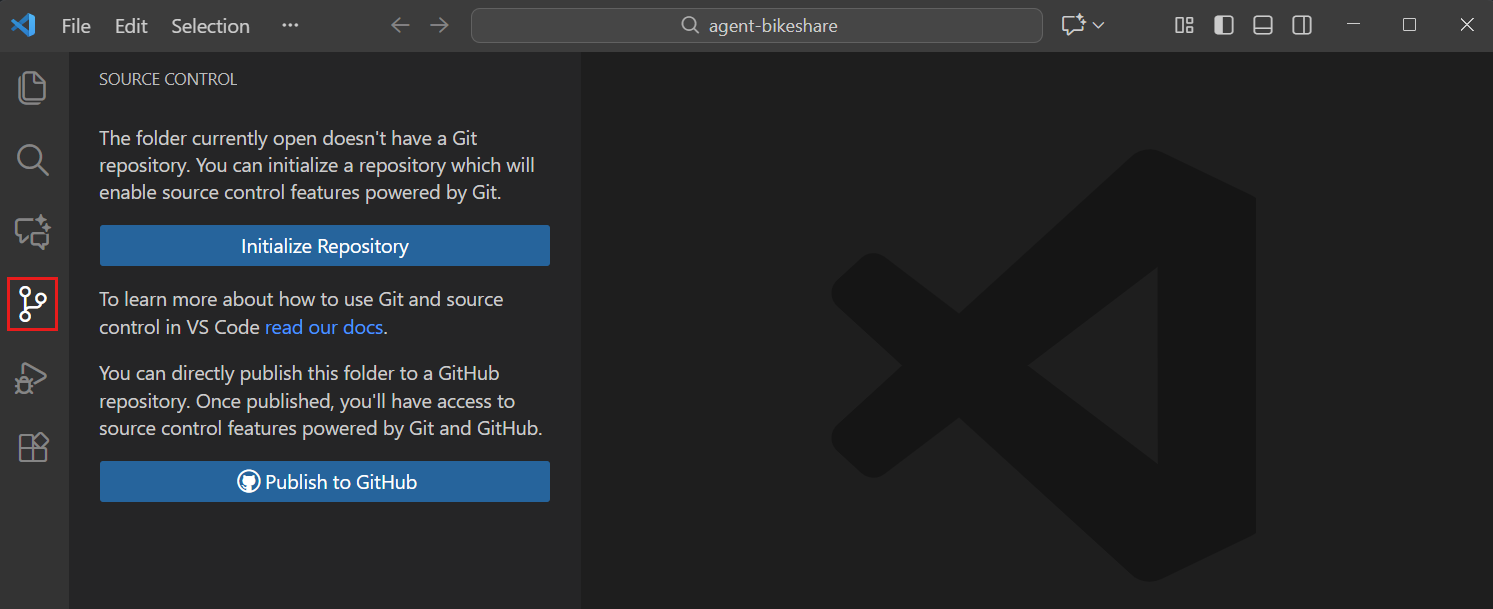
bookstats. - Open Source Control in the Activity Bar.
- Select Initialize Repository.
NoteRepository
A Git repository is a project directory whose changes and history Git can track. VS Code creates a hidden .git/ directory to store that history.
TipBash/Zsh equivalent
mkdir bookstats
cd bookstats
git init -b main
Add the initial README
Create README.md in the repository root and adapt the author name:
# bookstats

A cumulative project analyzing word frequencies in books from Project Gutenberg.

## Author

Your Name

## Books

| Gutenberg ID | Title | Author | Source URL |
|---|---|---|---|

## Filename convention

Book files use `<five-digit-gutenberg-id>_<hyphenated-short-title>.txt`.

## Repository contents

- `README.md`: project description and book inventory

## Setup

*To be added in Session 2.*

## Run the analysis

*To be added in Session 2.*

## Reproduce the results

*To be added in Session 4.*
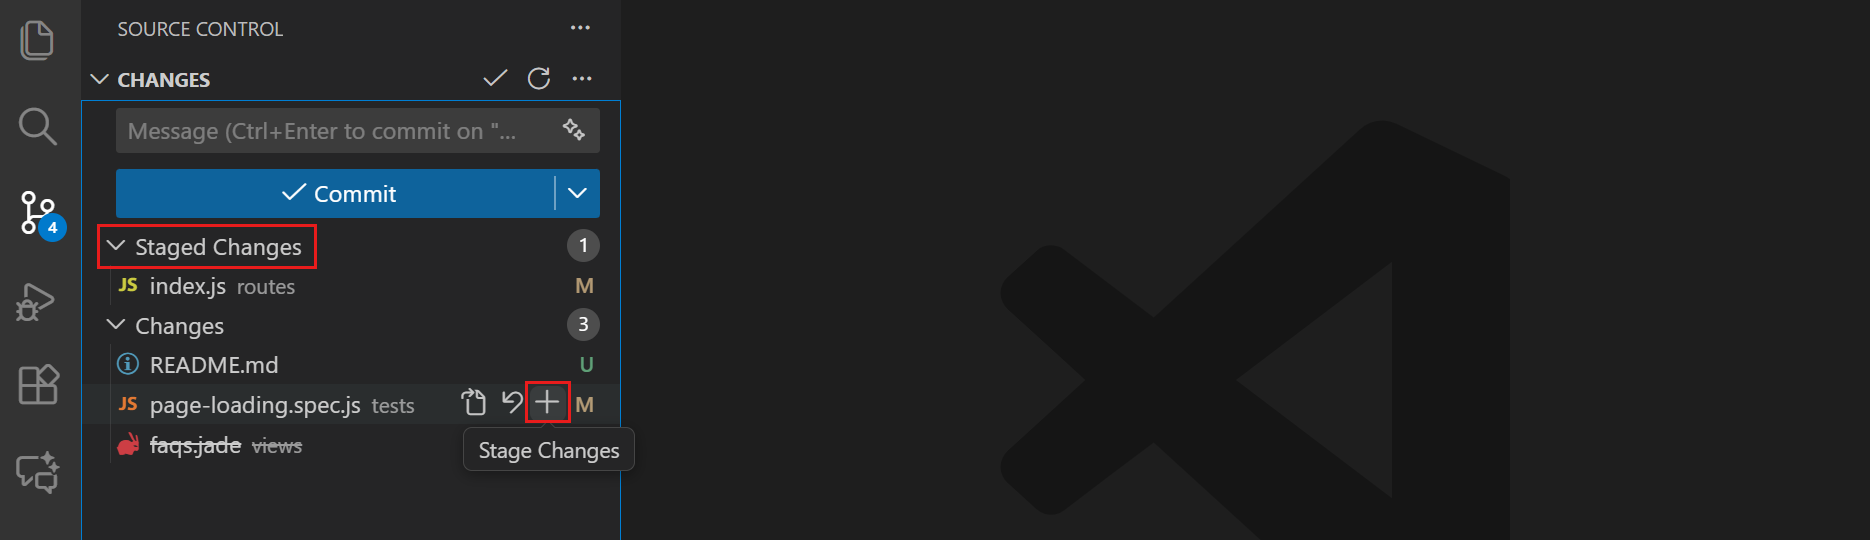
Open Source Control, stage README.md, enter the commit message below, and select Commit:
docs: start project README
NoteCommit
A commit records one meaningful project change. Its message should help you and other collaborators understand why that change exists.
ImportantBefore your first commit
Check the branch name in the lower-left corner of VS Code. This initial README belongs on main.
TipBash/Zsh equivalent
git add README.md
git commit -m "docs: start project README"
Publish the repository
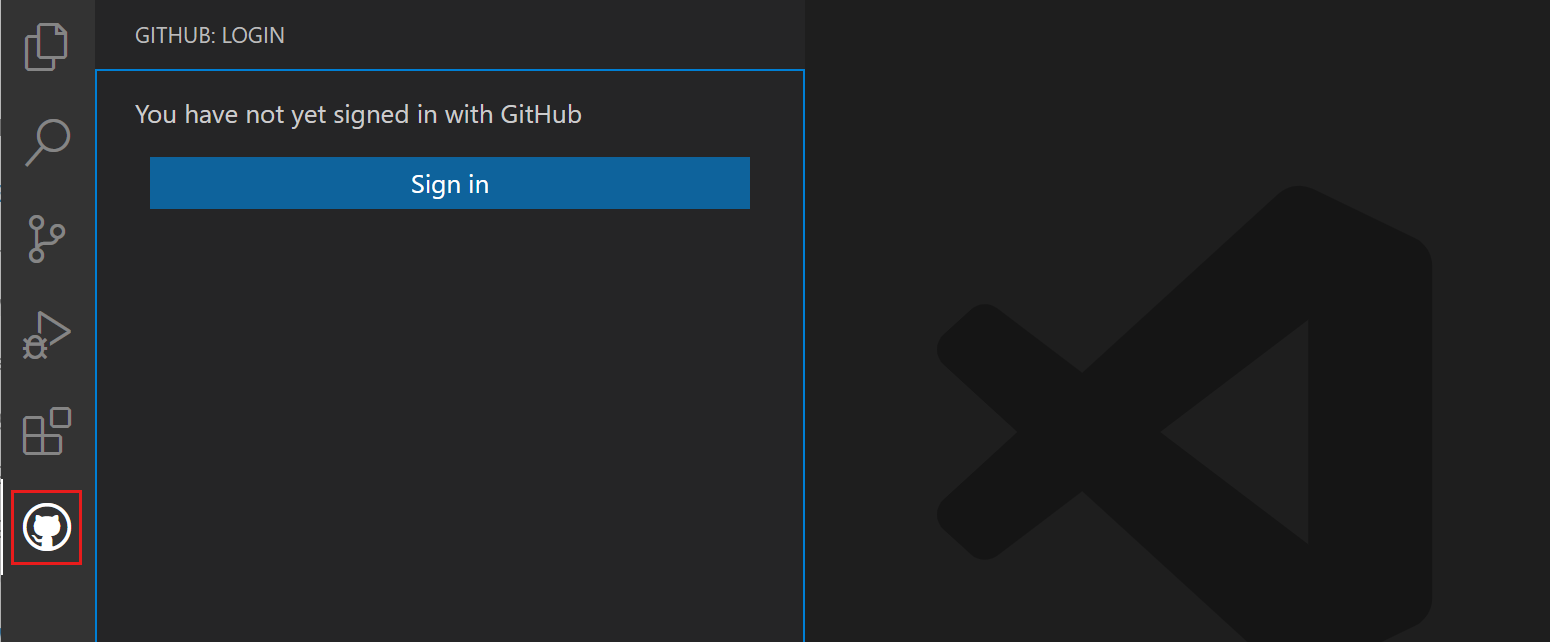
In Source Control, select Publish Branch or Publish to GitHub. Sign in if prompted. VS Code will display a prompt at the top of the window asking whether to publish to a private or public repository:
- Publish to GitHub public repository
- Publish to GitHub private repository
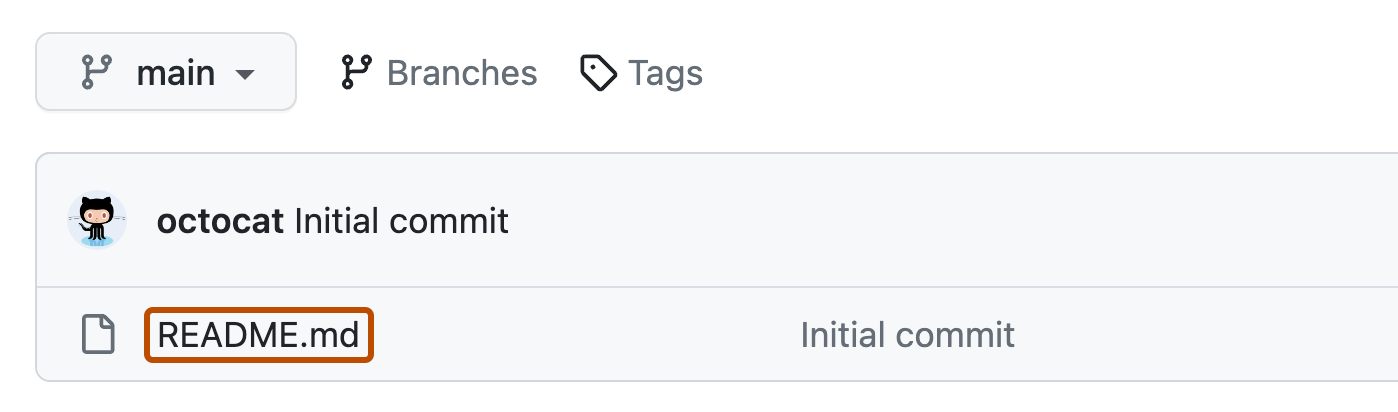
Choose Publish to GitHub public repository. Open the repository on GitHub and confirm that README.md appears on main.
main branch.
ImportantRepository visibility: choose Public
You must select Publish to GitHub public repository.
- Public: Anyone on the internet can see this repository. Your course partner and collaborators can view, fork, and submit pull requests to it.
- Private: Only you and specifically invited collaborators can see it.
If your repository is private, other participants cannot view it or fork it, which will block the collaborative exercises in this session.
TipAccidentally chose Private?
If you published your repository as private, you can change it on GitHub:
- Navigate to your repository page on GitHub.
- Select Settings (tab at the top).
- Scroll down to the Danger Zone section at the bottom.
- Beside Change repository visibility, select Change visibility > Make public.
- Follow the confirmation prompt to make it public.
ImportantBefore your first push
The destination should be <your-handle>/bookstats on GitHub. VS Code names this remote repository origin.
TipBash/Zsh equivalent
Using GitHub CLI:
gh repo create bookstats --public --source=. --remote=origin --pushCreate a branch for the first book
A branch lets you develop a change without placing unfinished work directly on main.
- Select
mainin the lower-left corner of VS Code. - Select Create new branch….
- Name the branch
add-frankenstein. - Confirm that the lower-left corner now displays
add-frankenstein.
TipBash/Zsh equivalent
git switch -c add-frankensteinAdd Frankenstein
The worked example uses Mary Wollstonecraft Shelley’s Frankenstein; or, The Modern Prometheus, Project Gutenberg ebook 84.
- Download the Plain Text UTF-8 edition from Project Gutenberg, or use the course fallback file.
- Save it in the repository root as
00084_frankenstein.txt. - Add this row to the README’s Books table:
| 00084 | Frankenstein; or, the Modern Prometheus | Mary Wollstonecraft Shelley | https://www.gutenberg.org/ebooks/84 |- Add the book to Repository contents:
- `00084_frankenstein.txt`: plain text of *Frankenstein*You may choose another Gutenberg book instead. Use its five-digit padded ebook ID, a lowercase hyphenated title, and record the title, author, ID, and source URL in the README.
Commit one complete change
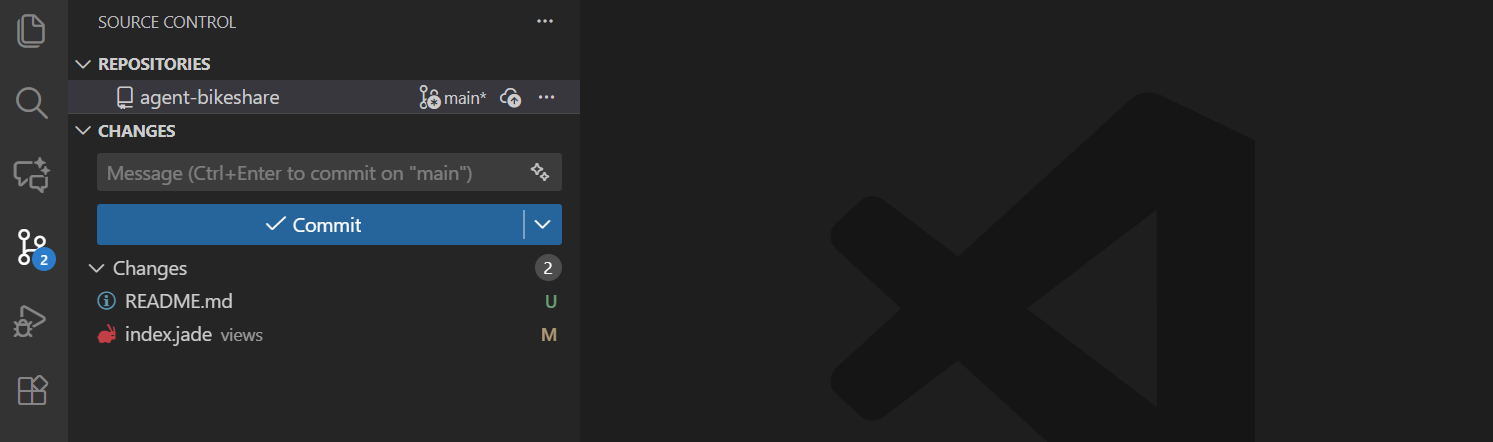
In Source Control, inspect the diff, stage both 00084_frankenstein.txt and README.md, and commit them together:
data: add FrankensteinThe two files form one focused change: the data arrives with the provenance a collaborator needs to understand it. A focused commit does not mean one file per commit.
ImportantWhere will this commit go?
Check that the open folder is your own bookstats repository and the current branch is add-frankenstein.
TipBash/Zsh equivalent
git add 00084_frankenstein.txt README.md
git commit -m "data: add Frankenstein"
Your local history now has a change on a short-lived branch:
Open a pull request to yourself
- In VS Code, select Publish Branch to push
add-frankensteintoorigin. - Open your repository on GitHub.
- Select Compare & pull request.
- Confirm that the base is your repository’s
mainand the compare branch is your repository’sadd-frankenstein. - Title the pull request
Add Frankenstein. - Create the pull request.
ImportantBefore your first pull request
Both sides belong to your repository:
base: <your-handle>/bookstats main
compare: <your-handle>/bookstats add-frankensteinInspect and merge the change
Open Files changed and inspect both files.
Confirm that the filename and README provenance agree.
Leave a general comment such as:
The filename and source metadata match the intended book.Return to Conversation.
Select Create a merge commit, then Confirm merge.
NoteWhy you cannot approve this pull request
The pull request is fully functional: it provides an inspectable diff and an audit trail for your project. However, GitHub does not allow authors to submit a formal Approve review on their own pull requests—in professional teams, approvals act as an independent quality gate. When working alone, simply inspecting the diff, leaving comments, and selecting Merge pull request is the standard workflow. Independent approval arrives when you work with a collaborator.
ImportantWhere will the merge go?
The merge commit is added to your repository’s main. The add-frankenstein branch remains separate until you delete it.
Synchronize and clean up
- On GitHub, select Delete branch after the pull request merges.
- In VS Code, switch to
main. - Select Pull so the local
mainreceives the merge commit. - Confirm that the book is present.
- Open the Command Palette and run Git: Delete Branch….
- Delete the local
add-frankensteinbranch.
WarningSwitch before deleting
Do not delete a branch while you are still working on it. Switch to main, pull the merged change, and only then remove the completed branch.
TipBash/Zsh equivalent
git switch main
git pull origin main
git branch -d add-frankensteinYour local history now reflects the complete loop, with the merged change integrated into main:
%%{init: { "theme": "base", "themeVariables": { "git0": "#2563eb", "git1": "#dc2626", "gitBranchLabel0": "#ffffff", "gitBranchLabel1": "#ffffff", "commitLabelColor": "#1e293b", "commitLabelBackground": "#f1f5f9" } } }%%
gitGraph
   commit id: "start README"
   branch add-frankenstein
   checkout add-frankenstein
   commit id: "add Frankenstein"
checkout main
merge add-frankenstein id: "merge Frankenstein"
Collaborate with another person
Find a collaborator. Call yourselves Collaborator A and Collaborator B. These names stay fixed, while your active roles will change:
- repository owner: owns the repository receiving the contribution;
- contributor: proposes and implements the change;
- author: opens the pull request; and
- reviewer: inspects and decides whether to accept it.
For the first pass, Collaborator A is the repository owner and reviewer. Collaborator B is the contributor and author.
TipTracking proposals with GitHub Issues
In professional software development and open-source projects, contributors often open an issue to discuss a proposed feature, report a bug, or agree on an approach before writing any code. You can learn more in the official GitHub Quickstart for issues. For this exercise, talk with your collaborator and agree directly on which Project Gutenberg book Collaborator B will contribute.
Fork and clone the repository
A fork is a repository on GitHub owned by the contributor. A clone is a local copy on the contributor’s computer.
NoteForks versus direct repository collaborators
Think of a fork as a personal server-side copy of someone else’s project where you have full permission to create branches.
In open-source software, external contributors do not have direct write permissions to the main repository, so they cannot push branches directly to it. Instead, they create a personal fork, push branches there, and propose changes upstream via a pull request. This also explains why GitHub does not let you fork your own repository: you already have write access and can create branches directly.
In contrast, within a trusted internal research lab or team, repository owners often add colleagues directly as collaborators (under Settings > Collaborators) and configure branch protection on main. Because this session teaches open-source contribution workflows, we use the fork model.
- Collaborator B opens Collaborator A’s repository on GitHub.
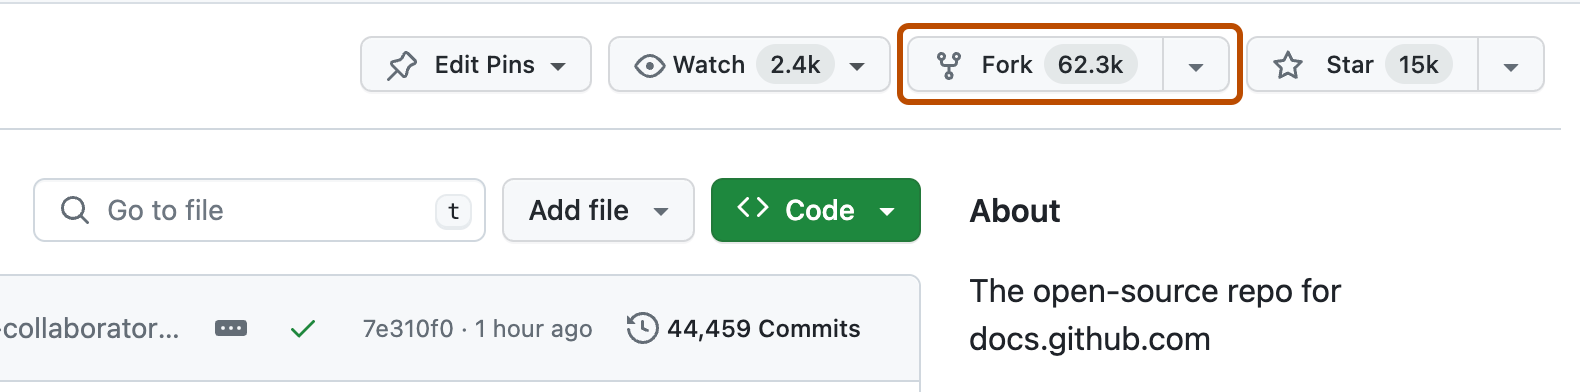
- In the upper-right corner of the page, select Fork.
- GitHub opens the Create a new fork page. Because Collaborator B already has their own repository named
bookstats, GitHub flags a name conflict: “The repository already exists in your account.”In the Repository name field, add Collaborator A’s GitHub handle:
bookstats-<collaborator-a-handle>Keep Copy the main branch only checked (the default). For this course, we only need
main. Note that in other open-source projects, you might uncheck this option if you need to work with or inspect other active development or release branches from the original repository.Select Create fork.
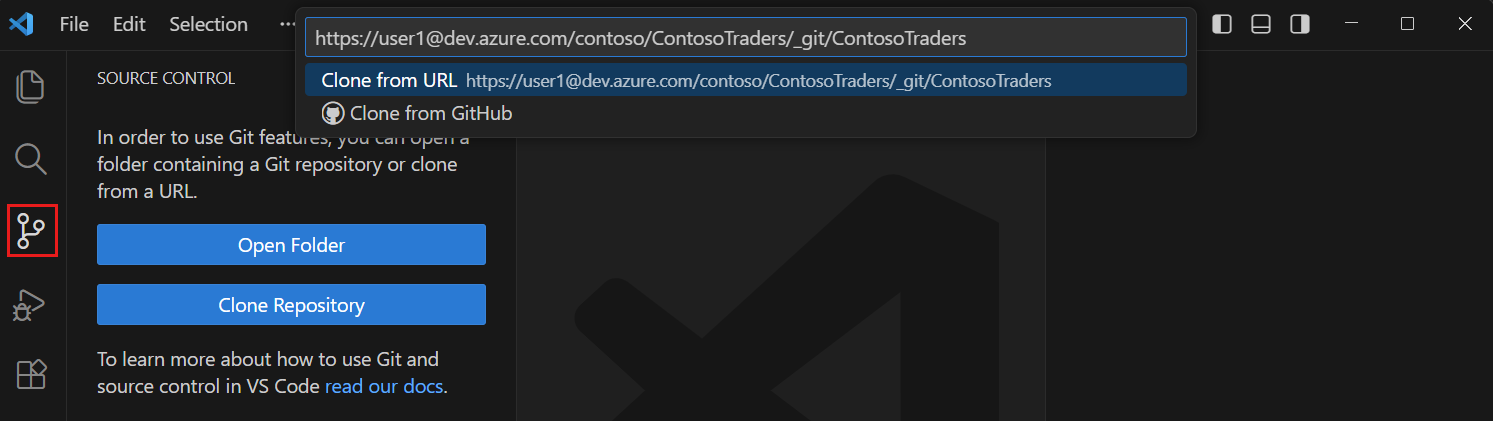
- In VS Code, run Git: Clone from the Command Palette.
- Paste the URL of Collaborator B’s fork:
https://github.com/<collaborator-b>/bookstats-<collaborator-a>.git. - To keep the two local repositories distinct, create or select a parent directory named after Collaborator A’s GitHub handle before cloning.
- Open the cloned repository in a new VS Code window.
The relationship is:
flowchart TD
U[Collaborator A repository<br/>upstream] -->|fork on GitHub| O[Collaborator B fork<br/>origin]
O -->|clone| L[Collaborator B computer<br/>local repository]
classDef upstream fill:#dbeafe,stroke:#2563eb,color:#172554
classDef origin fill:#fee2e2,stroke:#dc2626,color:#450a0a
classDef local fill:#f1f5f9,stroke:#475569,color:#0f172a
class U upstream
class O origin
class L local
Configure origin and upstream
Cloning automatically names Collaborator B’s fork origin. Add Collaborator A’s original repository as upstream:
- In VS Code, open the Command Palette.
- Run Git: Add Remote….
- Paste Collaborator A’s repository URL.
- Enter the remote name
upstream.
ImportantCheck the two remotes
originis Collaborator B’s fork. Contributor branches are pushed here.upstreamis Collaborator A’s repository. The pull request proposes a change here, but Collaborator B does not push directly to it.
TipBash/Zsh equivalent
git remote add upstream https://github.com/<collaborator-a>/bookstats.git
git remote -vCreate the contribution branch
In VS Code, create and switch to a branch named for the proposed book, such as add-dracula. Confirm the folder and branch shown in the window before editing.
TipBash/Zsh equivalent
git switch -c add-draculaAdd the collaborator’s book
Add the proposed book and its README provenance entry. Stage both files and create one focused commit:
data: add Dracula
WarningAvoid ‘#’ in commit messages
Do not write #345 (or any #<number>) in your commit message. On GitHub, #N automatically creates a link to issue or pull request number N, which can create confusing accidental references. Record the Project Gutenberg eBook ID in the README table instead.
Push and open the pull request
In VS Code, select Publish Branch. This pushes
add-draculato Collaborator B’sorigin.Open the fork on GitHub and select Compare & pull request.
Confirm the destinations:
base: <collaborator-a>/bookstats main compare: <collaborator-b>/bookstats-<collaborator-a> add-draculaTitle the pull request
Add Dracula to the book analysis.Add a clear description:
Adds *Dracula* by Bram Stoker and records its Project Gutenberg provenance in the README.Select Create pull request.
TipLinking pull requests to issues
When an issue exists, including keywords like Closes #1 or Fixes #12 in your pull request description tells GitHub to automatically close the referenced issue as soon as the pull request is merged into main.
flowchart LR
L[Local add-dracula] -->|push| O[origin/add-dracula<br/>Collaborator B fork]
O -->|pull request| U[upstream/main<br/>Collaborator A repository]
classDef branch fill:#fee2e2,stroke:#dc2626,color:#450a0a
classDef main fill:#dbeafe,stroke:#2563eb,color:#172554
class L,O branch
class U main
TipReview pull requests in VS Code
The GitHub Pull Requests extension can show pull requests inside VS Code. This course uses GitHub’s website because it keeps the repositories, branches, diff, conversation, review, and merge destination visible together.
Review and merge
Collaborator A now acts as reviewer and repository owner:
- Open the pull request on GitHub.
- Open Files changed.
- Check that:
- the contribution matches the agreed book and source URL;
- the filename follows the course convention;
- the README records the correct provenance;
- the commit is understandable; and
- the diff contains only the intended change.
- Leave a meaningful review comment.
- Select Approve, then Submit review.
- Return to Conversation.
- Select Create a merge commit, then Confirm merge.
ImportantWhere will the merge go?
Collaborator A is merging into the base repository. The merge commit is created on Collaborator A’s main, not in Collaborator B’s fork.
NoteIf the expected path is blocked
The exercise is designed to merge cleanly. If GitHub reports a merge conflict or another unexpected problem, stop and ask an instructor for help rather than opening a new troubleshooting path during this session.
Synchronize and clean up
Finish the collaboration before swapping roles.
Collaborator A — repository owner
- Open their own local
bookstatsrepository in VS Code. - Switch to
mainif necessary. - Select Pull from
origin/main. - Confirm that the collaborator’s book is present.
Collaborator B — contributor
- On the merged pull request, delete the remote contribution branch.
- Open their fork on GitHub.
- Select Sync fork, then Update branch.
- In the local collaborator checkout, switch to
main. - Pull from
origin/mainin VS Code. - Confirm that the merge and new book are present.
- Delete the completed
add-draculabranch locally.
The synchronized history contains the self pull request and the collaborator pull request:
%%{init: { "theme": "base", "themeVariables": { "git0": "#2563eb", "git1": "#dc2626", "gitBranchLabel0": "#ffffff", "gitBranchLabel1": "#ffffff", "commitLabelColor": "#1e293b", "commitLabelBackground": "#f1f5f9" } } }%%
gitGraph
   commit id: "start README"
   branch add-frankenstein
   checkout add-frankenstein
   commit id: "add Frankenstein"
   checkout main
   merge add-frankenstein id: "merge Frankenstein"
branch add-dracula
checkout add-dracula
commit id: "add Dracula"
checkout main
merge add-dracula id: "merge Dracula"
TipBash/Zsh synchronization
Repository owner:
git switch main
git pull origin main
Contributor, without rebasing:
git fetch upstream
git switch main
git merge upstream/main
git push origin main
git branch -d add-dracula
Swap roles
Collaborator A becomes the contributor and Collaborator B becomes the repository owner. Return to Fork and clone the repository and repeat the workflow with a different book.
The instructions are the same. Before acting, briefly check the open folder, current branch, and intended destination.
Completion checklist
Session 1 is complete when you can check every item:
Your course repository now contains a README and at least two sourced books:
bookstats/
├── README.md
├── 00084_frankenstein.txt
└── <collaborator-book>.txt
Your turn
Start using Git for one of your own projects. Create the repository, make an initial commit, and push it to GitHub. Make later changes on short-lived branches. Bring any questions, obstacles, or useful discoveries to the next Project Clinic.